Get Free Website Hosting With Dropbox, Google Drive, or OneDrive
Get Free Website Hosting With Dropbox, Google Drive, or OneDrive
Want to host a simple website? You’ll probably be happiest with a good cheap web host. While there are tons of awesome free web hosts to pick from, we don’t recommend that path because free web hosting has lots of downsides.
But if your website is simple, static, and just for fun, there’s another option: hosting on a free cloud storage service. Not only are cloud storage services more reliable than most free web hosts, there’s almost no learning curve!
This article assumes you already have your web pages ready to go, and only covers the actual process of making those files accessible online. Not there yet? Consider using a static site generator. I’ve used Nikola for this example.
How to Host a Website on Dropbox
Since Dropbox took away the ability to view public web pages, you’ll need to use a web service called DropPages.
DropPages connects to your Dropbox account and creates a special app folder that you’ll be using for the pages of your site. DropPages serves your web pages through its own web server, and ignores everything else in your Dropbox account.
The Pros and Cons of DropPages
Any time you make changes to your site files, DropPages updates its own versions of them and serves them right away. Managing your site involves nothing more than editing the local files in your Dropbox folder and letting them sync up.
Not only is DropPages extremely easy to use, but it comes with two free subdomains for accessing your sites. This makes it easy to share your site with others, and actually makes DropPages a viable option for simple sites that are more than “just for fun.”
While DropPages does have a free plan, you’re limited to 50MB of storage. That should be more than enough when you’re just starting. If you hit that limit, you can either pay for the Basic plan or switch to a traditional free web host.
How to Set Up DropPages
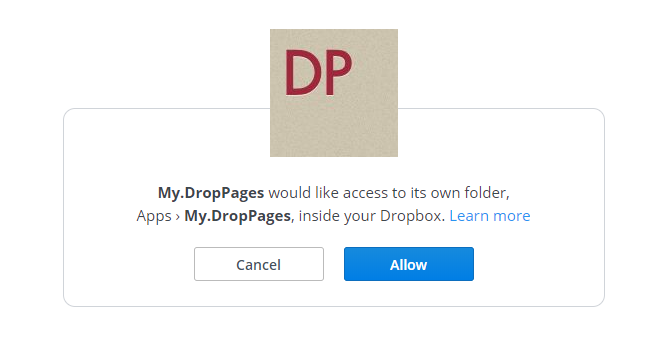
First, visit DropPages. Click Sign In to sign in to Dropbox, then grant permission for DropPages to access your Dropbox account by clicking Allow.

When prompted, type in the subdomain you want to use for your site and tack on .droppages.com at the end. For example, I created my site using jleemuo.droppages.com (which you can use to view my demo site).
This creates a new folder in your Dropbox account located at Dropbox/Apps/My.DropPages. Inside that new folder, you’ll see three subfolders:

The main one you should care about is Content, which is where your HTML goes. If you have any CSS, JS, or image files, put those in the Public folder. Templates can be safely ignored unless you intend to use DropPages’ templating system.
Upload your website into the appropriate folders and then wait for it to sync with both Dropbox and DropPages. If you want to speed things up or if it isn’t updating, you can go to your DropPages dashboard and click Publish Now or Reset Sync.
Now visit your domain in a web browser and you should see your site:

How to Host a Website on Google Drive or OneDrive
Since Google Drive and OneDrive don’t have built-in ways to host websites, you’ll need to use a free service called DriveToWeb.
DriveToWeb connects to your Google Drive or OneDrive account, looks for any publicly accessible HTML pages and assets, then takes those files and serves them through its own web server.
The Pros and Cons of DriveToWeb
What’s nice is that any time a file changes, DriveToWeb automatically catches it and updates itself. Want to tweak the text on a page? Just edit and save your version of the file on Google Drive or OneDrive and the web version will match. You don’t have to manually re-upload or force DriveToWeb to re-scan your drive.
DriveToWeb is extremely easy to set up. You can be ready in three minutes.
The downside? An ugly web address. DriveToWeb creates a randomized, anonymous identifier for accessing your site (mine is “vtqelxl5bdrpuxmezsyl9w”). This protects you so visitors won’t see your account name, but makes sharing difficult. The only people who’ll see your site are the ones you directly share the URL with.
How to Set Up DriveToWeb
First, make sure your website is uploaded to Google Drive or OneDrive and that all of the files are properly organized. Try viewing the site locally in a web browser to ensure it looks how you want it to look on the web.

Then, mark the website folder as publicly viewable:
- Google Drive: Go to drive.google.com, navigate to the folder, right-click on it, and select Share. Click Advanced at the bottom right. Next to “Private – Only you can access,” click Change and select “On – Public on the web,” then save.
- OneDrive: Go to onedrive.live.com, navigate to the folder, right-click on it, and select Share. Click Get a link. This is what makes it public. You can ignore the actual link, which we won’t be using.
Now that your website is public, visit DriveToWeb and click on whichever cloud storage service you’re using: Google Drive or OneDrive.

When prompted for permissions, grant them. This is necessary for DriveToWeb to find which HTML files and assets are publicly available.
Once permitted, DriveToWeb will spend a few seconds looking for those files and converting them into pages accessible on the web, then display a list of all the pages that were converted:

Congrats! Your site is now online:


0 Response to "Get Free Website Hosting With Dropbox, Google Drive, or OneDrive"
Post a Comment